1)Windows 10 Overuses Mobile Data
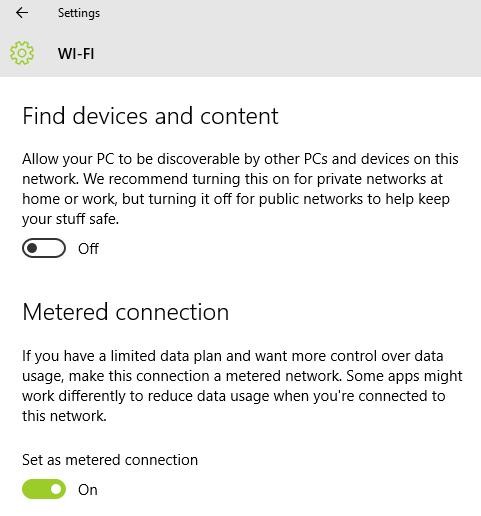
The problem happens in Windows 10 because of its automatic updates and other apps eating up data, even if you’re connected to a hotspot. To fix this issue, you can set the tethered hotspot as a ‘metered connection’ by following the given steps:
- Connect to the tethered connection (WiFi Hotspot)
- Open the new Settings and Click ‘Network & Internet’
- Choose Wi-Fi on the left and click ‘Advanced Options’
- Toggle the ‘Set as metered connection’ to on state
2)WiFi Sense Risks Privacy
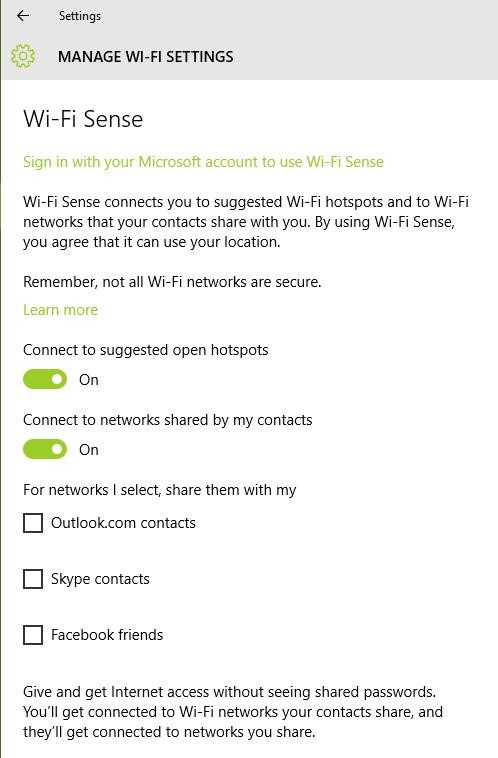
WiFi Sense encrypts and shares your WiFi networks’ passwords with your specific contact lists so that they can automatically connect to your wireless networks.It risks privacy and to disable WiFi Sense, please follow the steps below:
- Connect to the tethered connection (WiFi Hotspot)
- Open the new Settings and then ‘Network & Internet’
- Choose Wi-Fi on the left and click ‘Manage Wi-Fi settings’
- Uncheck the option ‘Connect to suggested open hotspots’ and ‘Connect to networks shared by my contacts’ to disable WiFi Sense – it’s switched off
3)Can’t Open Start Menu in Windows 10
This probably happens due to the improper installation of system files. In order to resolve this problem, please follow with the steps given below:
- Open the Run dialog by pressing Win+R
- Type “sfc /scannow” and hit Enter
- A blank command prompt will open and close (in a flash, may be)
- Restart the PC to check if it helped
In case it did not work, then follow the following process:
- Search for “cmd”, and right-click & choose ‘Run as administrator’
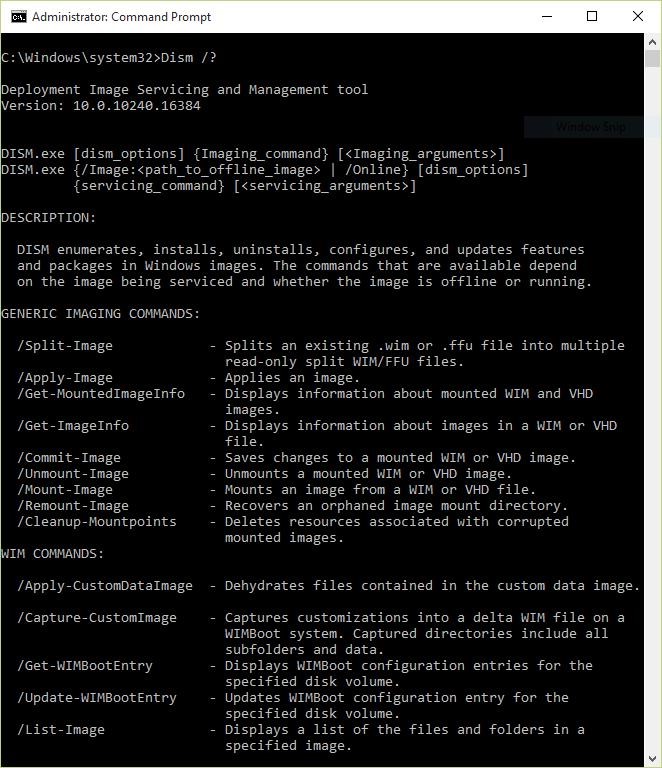
- Type in “Dism /Online /Cleanup-Image /RestoreHealth” and press OK
- Restart the PC after the scan completes – it will work
- In case the above methods didn’t work, then follow these steps:
- 1. Paste the below path in File Explorer and open it. After that, right-click on Command Prompt and choose “Run as administrator”.
- C:\Users\Beebom\AppData\Roaming\Microsoft\Windows\Start Menu\Programs\System Tools
- 2. Now, type start powershell and hit enter.
- 3. Once you are in the PowerShell window, execute the below command and wait for a while.
- Get-AppxPackage | % { Add-AppxPackage -DisableDevelopmentMode -Register “$($_.InstallLocation)\AppxManifest.xml” -verbose }
- 4. After the installation is completed, restart the PC and you will have the Start Menu working again.
4)Windows 10 Doesn’t Switch On
This problem mostly happens because of an USB stick plugged in your PC because that may change the hard disk’s partition numbers, hence Windows fails to find the required files and the error. Please follow these steps to rectify this issue:
- Remove the USB drive/stick from the PC and restart it
- If required, plug in the USB drive after Windows is loaded (after the lock screen or desktop is shown) – it will work
If your PC is still not turning on then you may have to do a reset of Windows 10. We have written a detailed guide on how to reset Windows 10, so go through the steps by clicking on the link.
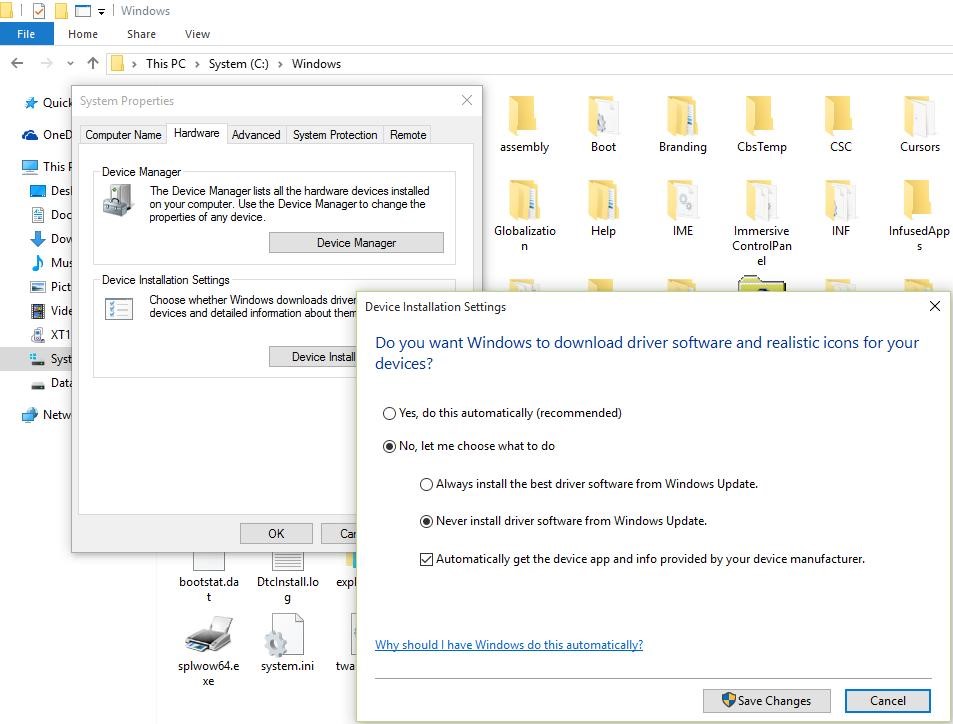
5)Prevent Automatic Driver Installations
To solve this issue, you need to disable this feature by following the steps below:
- Press Win+E to open the File Explorer
- Right-click on ‘This PC’ and go to Properties
- Click on Advanced System Settings and select the Hardware tab
- Click on Device Installation Settings
- Select ‘No, let me choose what to do’
- Check the option ‘Never install driver software from Windows Update’ and press ‘Save Changes‘ and then OK
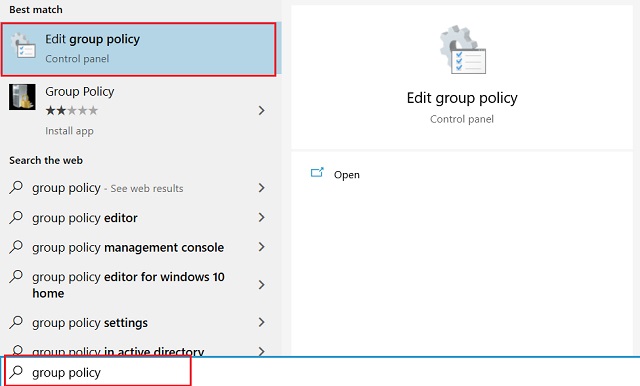
Alternatively, you can disable automatic driver installation from Group Policy. Here is how you can do it.
1. Open the Start Menu and search for “Group Policy”. Now, click on the “Edit group policy” menu at the top.
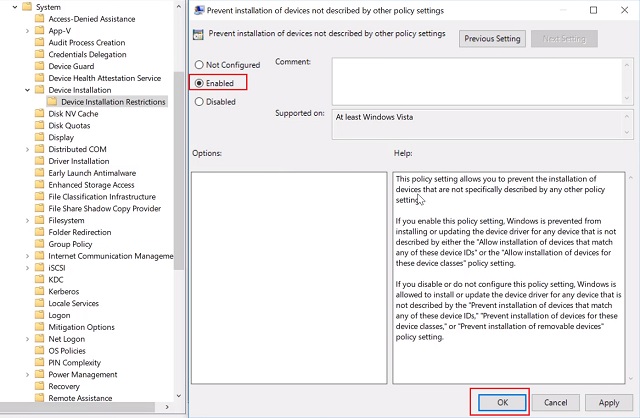
Here, navigate to Administrative Templates → System → Device Installation → Device Installation Restrictions. Here, look for “Prevent installation of devices not described by other policy settings” and open it. Usually, it’s at the bottom.
3. Now, enable it and click on the “Ok” button. You are done.
6)Windows Search Can’t Find any Applications
This problem basically arises in the Windows 10 update, but the current update (Threshold 2) will supposedly remove it. Till the update rolls out for everyone, you can follow the process below to solve the issue:
- Click Ctrl+Alt+Del and choose ‘Task Manager’
- Kill the process ‘Explorer.exe’
- Press Win+R to open the Run dialog
- Type “regedit” and press Enter
- In registry editor, delete the following registry key:
HKEY_LOCAL_MACHINE\SOFTWARE\Microsoft\Windows\CurrentVersion\Explorer\FolderTypes\{ef87b4cb-f2ce-4785-8658-4ca6c63e38c6}\TopViews\{00000000-0000-0000-0000-000000000000}
- In the Task Manager, go to File -> Run new task
- Type in “explorer.exe” and press OK
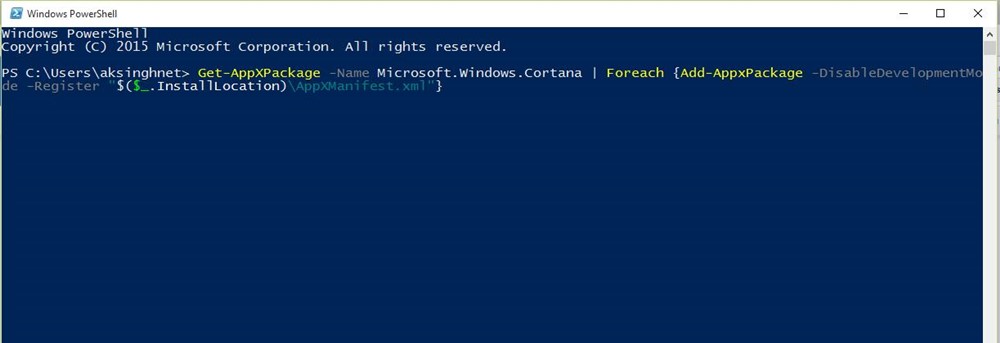
If the problem still occurs in Cortana, then please do these:
- Press Win+X and choose ‘Command Prompt (Admin)’
- Type “start powershell” and hit Enter
- Run the following command there:
Get-AppXPackage -Name Microsoft.Windows.Cortana | Foreach {Add-AppxPackage -DisableDevelopmentMode -Register “$($_.InstallLocation)\AppXManifest.xml”}
- The problem will be fixed within sometime – try searching now